
How to set up a scanner on your Mac computers
This article is about how to set up a scanner on your Mac computers. If you want to copy documents from your Mac computer, you’re in luck: if you have a scanner or a scanner-enabled printer, you may not need to install any software to make it work on your Mac. We will also look at how to scan documents on Mac
Before you can copy documents on a Mac, you need to configure your computer properly, which means you must make sure you have the latest scanning software on your Mac.
After that, you can start scanning documents on your Mac with the following steps.
Note that the method you use will depend on the type of analysis you have.
Of course, you’ll need to set up your computer and scan properly, but it’s a simple task that won’t take more than a few minutes. Then you can start scanning documents on your Mac.
How to set up a scanner on your Mac computers
Here we go over everything you need to know about how to go from basic to scanning on a Mac, depending on the type of scanning you’re using.
Before you set everything up, make sure your Mac has the latest version of graphics and scanning software installed on your computer.
You can skip this step if you are using an AirPrint multifunction printer and scanner.
- Following the instructions on your scanner or printer, connect the scanner to your Mac, turn it on, and turn it on. However, do not install any software that contains your analysis; Your macOS computer will download it automatically.
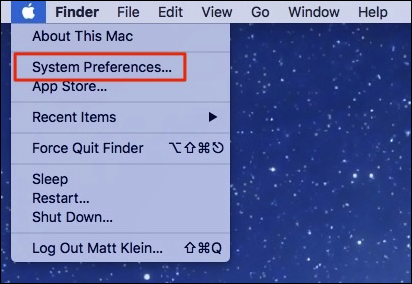
2. Go to the Apple icon in the upper left corner of your screen and click on “System Preferences“.
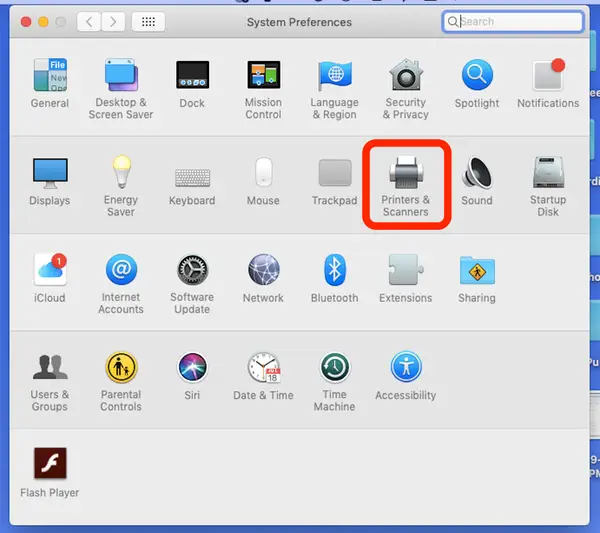
3. Select “Printers and Scanners“.
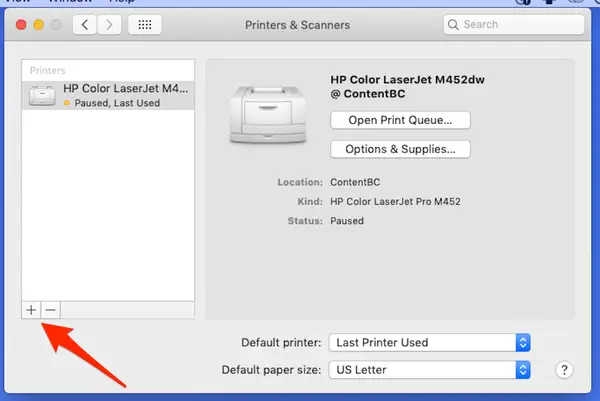
4. Choose your scanner.
If you don’t see your review listed, you should first click on the plus sign in the lower left corner of the screen.
Click “Add“.
How to scan documents on Mac
Now that your browser is set up properly, here’s how to start using your Mac. The methods are different depending on whether you are using a cookbook or a random search tool.
In any case, however, the first step remains the same: you need to open your scanner.
1.Connect your scanner to your Mac and turn it on.
2. Click the Apple icon on the top left, then select “System Preferences” followed by “Printers & Scanners“.
Select a search from the list on the left side of the window.
Then follow the instructions for the type of test you have:
Use the research paper review tool
1.Add your page to the survey submission.
2. Select “Use document feeder“.
3. Set your scanning options (such as color, double-sided pages, paper size, and memory).
4. Click “scan“.
Keep in mind that if you want to use different settings (like color for some pages and black and white for others), you’ll need to scan them as separate groups.
Use a flat cloth probe to scan
1. Place your item on the scanner bed.
2. If necessary, select “Use Document Feeder“.
3. Choose a saved location.
4. Select the document size.
5. Click “scan“.
If you want to scan multiple images at once and save them as separate files, make sure there is free space between each item on the scan layer.
Note that documents with multiple white spaces can also be saved directly as multiple files.
You may also like
How to make a Local Account in Windows 10 without Password
This article is about How to make a Local Account in Windows 10 without Password. Did you know that
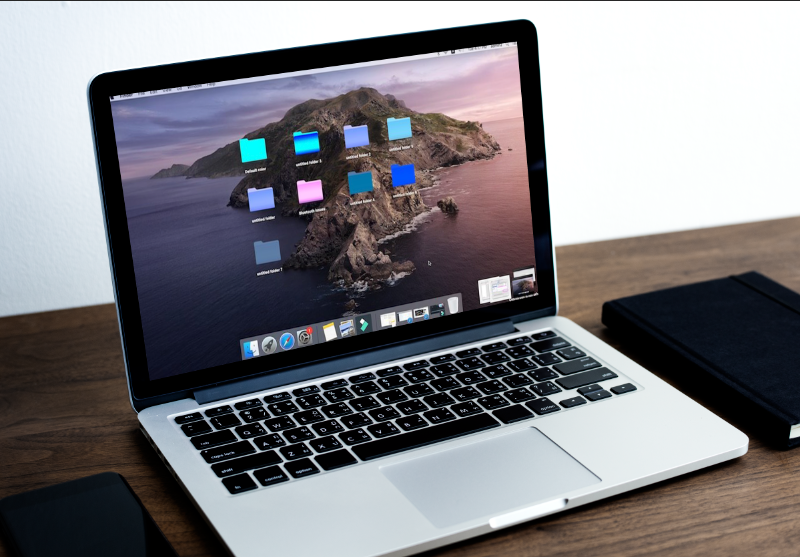
How to create a folder on a Mac computer – 2 ways
This article is about how to create a folder on a Mac computer. If you want a Mac with a clean deskt
how to keep android screen on for long
This article is about how to keep android screen on for long. If you want the screen to be on for a