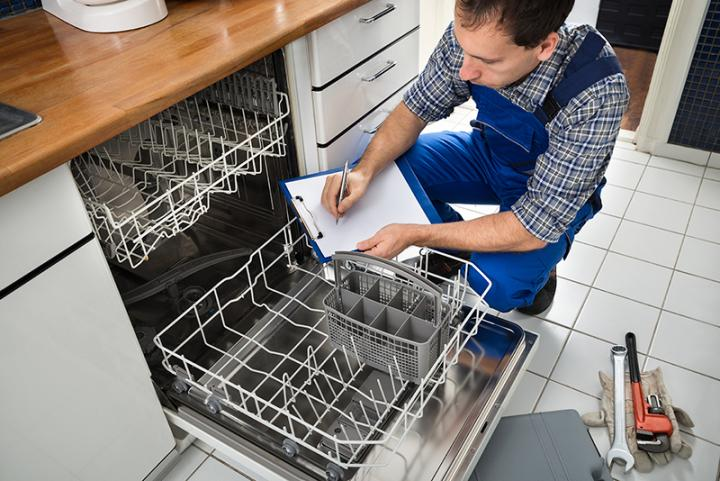
how to repair and service a dishwasher
Did you know how to repair and service a dishwasher? and did you know you can do it yourself?The control panel of new dishwashers can be intimidating. They are filled with so many dials, buttons and other things that the machine seems difficult to fix. This is not true. Aside from the control panel, the design of dishwashers hasn’t changed much in the last two decades. You can fix a lot of dishwashers yourself, we will discuss tips for do-it-yourself work and maintenance in this article.
Dishwasher parts can be replaced as one, which is often easier and cheaper than having a professional repair it.
If you are not sure if the part is still usable, remove it from the dishwasher and take it to a professional to test it.
You can decide whether to buy a new part or repair the old one based on the repair plan.
Dishwashers usually run on 115 volt or 120 volt power.
The water they use comes directly from the water heater, and the waste water is pumped into the sink’s waste pipe.
Do not mix dishwashing detergent with cold water. For best dishwashing results, set the temperature control to at least 140 degrees Fahrenheit.
Water cooler than this will not clean dishes, unless your dishwasher is a newer model that heats the incoming water.
The water stop for the dishwasher is usually under the side sink.
Caution: Since stainless steel is connected to the plumbing and electrical systems, you must take both systems into consideration when working with this appliance.
Before doing any work on the dishwasher, make sure that the appliance is not unplugged or the power on the appliance is turned off, and remove the fuse or disconnect the circuit breaker on the control door or side. different.
Turn off the water from the dishwasher when you close the basement or the dining space under the kitchen.
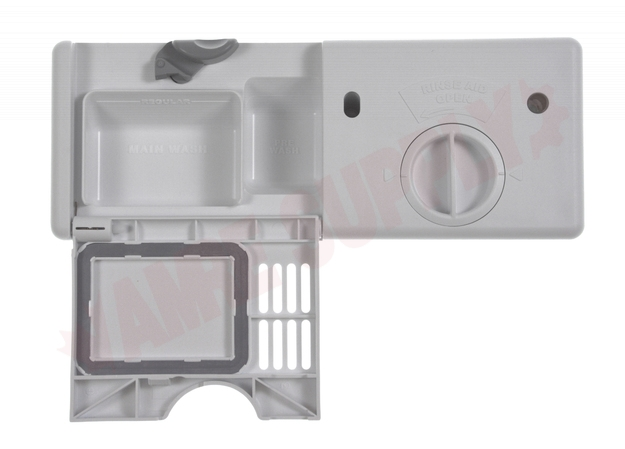
Base plate installation service check
The control panels of new dishwashers can seem intimidating or complicated to repair. This is not the case. Learn how to repair a dishwasher. The control panels of new dishwashers can seem intimidating or complicated to repair. This is not the case.
Learn how to repair and service a dishwasher
Here are some performance checks you can do if the dishwasher isn’t running:
Step 1: Check that it can. If the unit is plugged into a wall outlet, check the cords, plugs and sockets to make sure they are working properly.
Also check the switch that controls the aperture to make sure it is turned on. Most dishwashers are wired directly into the circuit.
Check the door panel for a blown fuse or damaged circuit, then reset the circuit. If your house is big, the dishwasher can be used in a small separate installation; check for a damaged fuse or circuit in the panel and replace the circuit.
Step 2: If there is power in the circuit and the wall outlet is controlled by the switch, the switch may not be bad.
- Test the switch with a tester.
- Remove the cover plate from the switch and attach one probe of the tester to one end and the other probe to the other end.
- If the tester bulb lights up, the switch is working.
- If it doesn’t light up, the switch is bad.
Replace the switch with a new one of the same type.
Step 3: Make sure the door is closed and locked.
The dishwasher will not work until the cable is properly installed.
- To check the hole, close and close the door, make sure.
- Then, while pressing the button closed, turn the control knob to the ON position.
- If the dishwasher is running, the hose is bad and needs to be cleaned, sealed or replaced.
Step 4: Make sure the water is turned on and the water temperature is high. A broken water heater can stop the water flowing to the dishwasher.
Test the hot water in the kitchen or bathroom sink.
If you can boil water, a water heater may not be a problem.
Step 5: Make sure that the management control rules are set correctly.
The new push button controls can feel a bit clumsy; make sure the buttons are pressed firmly in place.
If you’ve gone through five checks without finding the answer, it’s time to dig deep into the dishwasher.
Emptying the dishwasher
Access to the working parts of most dishwashers is through the front door of the unit.
Many machines can be repaired simply by opening the door and accessing various components, such as sprayers, strainers, float switches, screens, and door latches.
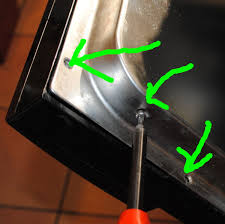
- To access the control panel on the door, remove the screws around the panel. These screws can be found under the cut-out piece, which usually fits inside the metal case.
- Remove the pieces with a knife or a strong screwdriver, or remove the fasteners that hold the molding.
- The control ring is mounted on the wood or held by a small screw set at the bottom of the head.
- In some dishwashers, the entire front door must be removed to access the control equipment.
This panel is held to the door by a set of screws, which are usually on the edge of the back of the door.
In most models, once the control panel is removed, the door panel can be removed by opening the door retaining screw system.
Sometimes the mounting screws are covered with moving parts, which need to be lifted or removed.
To access the motor, pump, hoses, intake valves and other parts, remove the lower opening.
This can be done without removing the entire door.
The panel can be fixed by using screws, or it can be lifted up and out with metal hangers.
If the dishwasher is small, tip the machine to the back or to the side before removing the control door or the lower opening part. It can give you a better working environment.
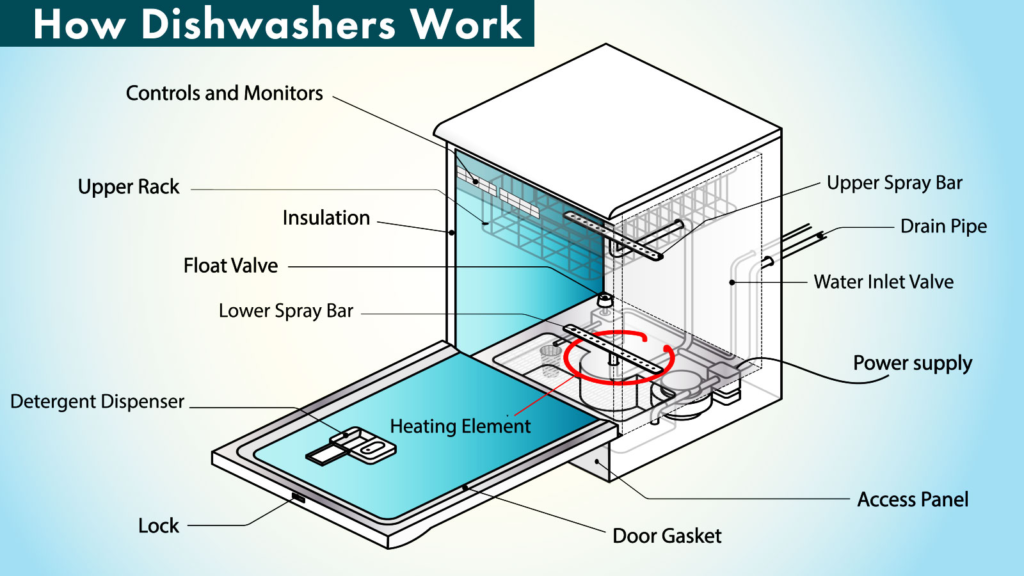
Once you can get inside the dishwasher, knowing the main parts and how they work will help you diagnose the problem.
We will explore the main features and how to view them in the next section.
Door and switch repair
When your dishwasher isn’t working properly, there are a number of important things to check, such as door seals, door handles, switches, and timers.
Replacement sign door
If water comes out of the dishwasher door, the seal may be defective.
Open the door and inspect the gasket. It should be soft and firm. If it is worn, cracked or hard, it must be replaced.
Once the gasket is in place, check that it fits the center of the door. It will fit perfectly, without cracks or cracks between the gasket and the frame.
If necessary, tighten or loosen the adjusting screws, or replace the gasket and clip or door channel.
Then run the machine through the wash cycle and check for leaks.
If you see water leaking and the gasket is sitting properly, try changing the door opening.
The trick is to keep the gasket close to the door without removing the gasket or cutting it too tight when the door is properly sealed.
Adjust the latch or gasket until it fits in the center of the door.
Door slot management
The dishwasher door is opened and closed frequently, and this heavy use can cause mechanical problems.
The latch can loosen or come off, disrupting alignment and preventing the door from closing properly.
When this happens, the cable does not engage properly and the dishwasher does not start.
In most cases, you can solve the problem by changing the position of the latch.
- Move the cable slightly by loosening the screw that holds it.
- Use your finger or a screwdriver to pry the stump; the screw holes are made especially for this.
- Close and open the door to see if the strap fits properly. Tighten the screws to hold it in the correct position.
- After you reset the hole, check to see if it’s working properly.
- Close and lock the doors and turn the ignition switch to the ON position. If the dishwasher does not start, the cable is faulty.
- Replace it with a new cable, connect it to the same connection as the old one. You may need to move the new latch back and forth several times before it works properly.
dishwasher Door replacement
In most dishwashers, the cable is flexible enough to operate timers and other controls. If the cable is not properly made or the adjustment is incorrect, the machine will not work.
How to test and repair the door switch:
Step 1: Close the door and hold the hatch in the closed position. This works best with a single unit with a lever type cable. Then turn the control to the ON position.
If the unit is working, the problem may be a faulty switch.
Use a screwdriver to fix the lock unit.
Step 2: Use a volt-ohm-milliammeter (VOM) to test the switch set to RX1 measurement.
- Remove the panel that covers the door switch and remove one of the power cables from its end.
- Connect the VOM probe to each end of the switch and close the dishwasher door.
- If the counter reads zero, the switch is active.
- If the counter shows a value greater than zero, the switch is bad and should be replaced.
Step 3: Replace the switch
Float Switch Correction
Dishwashers are often protected against overflow by an overhead switch. This switch is at the bottom of the device.
Here’s how to check and replace it:
Step 1: Open the door and remove the lower plate holder. Check if the float valve is stuck. If so, clean the food debris from the water.
Using a screwdriver, tap the top of the fifth to release it.
Step 2: If tapping doesn’t work, remove the bottom access panel and locate the bottom of the floating switch.
Use the VOM to set the offset to the RX1 range.
Open the electronic lead wire from the switch terminal and apply a VOM probe to each terminal.
If the counter reads zero, the switch is not bad.
The problem may be with the timer. If the counter shows a value greater than zero, the switch is bad.
Step 3: Replace the switch with a new one designed to fit the dishwasher. The switch is held in place by the adapter and screws; remove the screws to remove the old switch.
Step 4: Connect the new switch the same way you connected the old one.
Time management and control switches
Since timers control many functions, poor timing can cause many problems.
- Test the timer with the VOM set to the RX1 level.
- To access the timer, remove the front control panel.
- The timer is located directly behind the main timer control.
- Disconnect one of the terminal wires and attach a VOM probe to each terminal.
- If the counter reads zero, the timer is running. If the counter shows a value greater than zero, the timer is faulty and should be replaced.
- If possible, use the same method to test the selector on the circular ring.
- If you are not sure if you can handle these switches, call a service professional.
- Replace a faulty timer – or faulty control switch – with a new one designed for the dishwasher.
The timer is connected to several wires that provide power to operate the various functions of the dishwasher.
To replace the timer, have a helper hold the new timer next to the old one. Connect the new timer wires one by one, remove the old wire and connect the new one, to make sure you connect the wires properly.
The wire can be a friction fit at the edge.
If so, use a long nose tool to remove the wires.
Do not pull the wires, otherwise you may damage the connection between the wires and the clip.
After connecting the wires, set the new timer in place, store it as the old one was installed, and replace the control panel and the finger.
If your dishwasher is not filling or cleaning properly, you may have a valve or heating problem. In the next section, we’ll look at how to analyze these types of issues.
Valve, distributor and plate repair
Regularly checking and maintaining the various valves, detergent dispensers, and dishcloths can ensure proper water and detergent quality in your dishwasher.
Water inlet valve maintenance
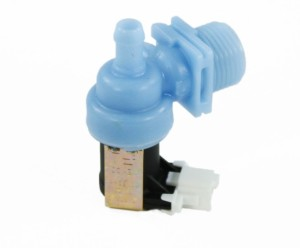
The water inlet valve controls the amount of water that flows into the dishwasher. It can be activated by a timer or solenoid.
If the dishwasher does not fill:
Step 1: Make sure the water is turned on in the unit and there is no problem with the water heater.
Turning off the water heater will stop the water in the dishwasher.
Step 2: Check the timer to make sure it is running in the order it was designed.
If water and time work, the problem may be with the inlet valve.
Step 3: Check the inlet valve at the bottom of the dishwasher.
Intake valve failure can also occur when the screen inside the valve becomes clogged with mineral deposits.
To solve this problem, tighten the screen with a screwdriver and clean it thoroughly under running water.
Then replace the screen.
Step 4: If the valve is controlled by the valve, the solenoid is attached to the side of the plate. Gently tap the solenoid on the valve with the handle of a screwdriver to free it from any obstructions.
Then restart the dishwasher.
Step 5: If the solenoid is not full, test the solenoid with a volt-ohm-milliammeter (VOM) set to measurement RX1.
Disconnect the wire from the solenoid and place a probe through the VOM at each solenoid terminal.
If the meter reads from about 100 ohms to 1000 ohms, the solenoid is working.
If the reading is more than 1000, the solenoid is bad and should be replaced.
Step 6: If necessary, replace the solenoid with a new one of the same size and type.
A poorly worn or bent intake valve cannot be repaired.
If the valve is damaged, replace it with a new one made for dishwashers.
The valve is usually attached to the indicator with a screw.
Remove the fitting connecting the valve to the water inlet.
Then remove the screws and remove the valve.
Install the new valve by making a cone
Maintenance of drain valves
Some dishwashers have a drain valve. These valves are only used in dishwashers with non-reciprocating motors. If the drain valve is not working properly, call a service professional.
Heat management
Dry dishes are served with warm ingredients. In most dishwashers, the light fixture is attached to the screen and bottom of the tub; it’s like an electric heater. The light bulb doesn’t always work, but it can turn off.
If you think something is wrong:
Step 1: Test it with VOM set to RX1 measurement. Remove the bottom access part of the dishwasher and disconnect one of the element’s power leads.
Attach a VOM probe to each element terminal. If the meter reads between 15 and 30 ohms, the element is working.
If the reading is above 30 ohms, the element is bad and should be replaced.
Step 2: If necessary, replace the heater with a new one designed for the dishwasher.
Disconnect the electrical cable from the end of the screw element and remove any nuts or other fasteners holding the element to the end.
From inside the tub, pick up the element.
It can be held by clips and ceramic in the tub, but you can easily drive it past the holes.
Put a new heating element in there, connect the power cable and replace the screws that hold the element.
Cleaning DETERGENT dispenser
Accumulated detergent from the previous wash can cause problems with the washing machine.
Buildup can get into the detergent and block the liquid that causes the tray to spin, or it can cause the tray to slow down.
- If the dispenser does not open, first make sure that you do not place the machine so that plates or pots and pans touch the dispenser and that the dishcloth does not block the dispenser.
- Also check that the distribution tray is not cracked.
- If the detergent left in the drawer is almost liquid, not just liquid, the drawer may be damaged.
- If you cannot solve the problem quickly, replace the distributor assembly.
- This is usually easier than trying to remove it and replace the parts.
- Use a new dispenser designed for dishwashers.
- The screws that hold the server in place can be on the front of the unit, or you can remove the door panel to access the screws for replacement.
- Remove the old distributor and install the new one, connecting it the same way the old one was connected.
Problems with the dishes arise usually because the racks have entered the tub after full use.
Careless handling can apply enough force to crack or break moving wheels or throw them off the track.
Simple solution: stop jamming racks.
Maintenance is also easy.
- Remove the racks by removing the small metal pins that hold them to the rails. Or just lift the brackets and remove them from the rail.
- Then reinstall the racks and rails so that they rotate properly. If the rollers are broken or broken, replace them with new ones of the same type.
- The rollers can be adjusted by the tension in their holes.
- Remove them to replace them. Or, if they are held in place by small, wet clips, remove the clips from the refrigerator or pry them open with the tip of a screwdriver.
- If you cannot remove the rollers to replace them, remove and replace the entire bed.
A noisy shower faucet or water that won’t flush are problems that, in most cases, can be fixed on your own.
What do you know about dishwashers?
Keeping a dishwasher, sink and water pump handy will help prevent problems before they happen.
Here’s how to check these important features.
Cleaning the spray arms
Spray arms do not cause problems, but sometimes the spray holes in the arms are covered with soap or minerals.
When this happens, it is important to clear the holes so that the arm can work properly.
- Remove the lower arm by exposing the cap that secures it to the motor shaft.
- Wash it thoroughly with water and a mild detergent.
- Sharpen the lead pencil and break the edge. Use the folded end of the pencil to trace the holes. A wooden manicure stick can also be used.
- Do not use scales, matches or metal objects for this project.
- Hot wood can break in the port, causing a stoppage; the iron can cut and widen the port.
After cleaning, put the spray arm back on the motor shaft and twist the cap to hold it.
Follow the same procedure to clean the spray arm.
Removing and cleaning the strainer
The strainer is located directly below the spray arm. When food and debris clog the sink, the dishwasher can flood or overflow.
In some dishwashers, the washer is made of plastic or metal with two half-circles.
- To remove this type of strainer, pry. In other dishwashers, the strainer is one piece.
- To remove this model, remove the cap that holds the spray arm on its axis.
- Also remove the spray arm from the strainer.
- Wash the inside of the cooker with water and a mild detergent.
- Use a stiff brush to remove any debris from the cracks and crevices. Wash the strainer thoroughly and replace it.
If any part of the strainer lifts up for regular cleaning, check it and clean it – if necessary – after washing each dish.
Troubleshooting Leaks
If the dishwasher is leaking and you know that the problem is not related to the overflow of the tub, the pump, or the inlet valve problem, the connection of the pump may be incorrect.
Many dishwashers are connected to water with metal pipes, and the blockage can be in these things.
If the items are attached to the thread, use a ring that can be used to tighten them.
If that doesn’t work, it’s likely that the wires are missing or the fitting is broken or damaged again.
In this case, replace the appropriate one.
Most dishwashers discharge waste water through a line or pipe connected to a drain or waste outlet under the kitchen sink.
If the hose is a flexible hose, it can burst from prolonged exposure to hot water. Inspect the pipes, if damaged, replace it.
If the hose is loose at the connection to the garbage disposal or dishwasher, tighten the washer or screw on the connection, or replace the screw.
Also check for leaks around inlet valves, drain valves, and anywhere you see flexible hoses and hose connections.
A break in the clutch can be stopped by closing or replacing the fastener.
Holes in pipes can be cleared by replacing pipes.
Water pump maintenance
To get to the water pump, remove the arm from the screen, then the pump house.
Remove the bolt and the pump can be disassembled.
To get to the water pump, remove the arm from the screen, then the pump house.
Remove the bolt and the pump can be disassembled.
In most dishwashers, the water pump is located under the drain arm. This part transports water from the dishwasher.
The pump has two impellers, one up and one down. These, as well as other ingredients, can be washed away with food or soap.
Step 1: Remove the cap that secures the spreader arm.
Step 2: Remove the spreader arm, screen, pump housing, bolt, top impeller, food grinder blade, spacer plate, impeller cover, flat plate, O-ring and bottom impeller. Arrange the parts in order as you take them apart so you can assemble them properly.
Step 3: Clean the part thoroughly with a mild solution. If any parts are worn, replace them with new parts that are dishwasher safe. Step 4: Replace all gaskets, such as O-rings or other gaskets, with new ones.
Step 5: Reinstall the pump keeping the parts in order.
To get to the water pump, remove the arm from the screen, then the pump house.
Remove the bolt and the pump can be disassembled. In some dishwashers, the lower faucet functions as a pump.
This type of system usually has a variable speed motor; Machines with non-reciprocating motors have water valves, as described above.
If your machine has an impeller pump system and water is not flowing out of the dishwasher, clean the pump’s bottom drain.
This can solve the problem. Otherwise, call a service professional.
dishwasher motor Repair
If the dishwasher motor is not working, do not attempt to fix it yourself.
Call a professional to repair or replace the motor. However, before calling for service, you should check that the timer is working and that the dishwasher is powered.
Don’t let spills, noisy messes, soap stains or other things keep you from using your dishwasher.
Many problems can be solved on your own if you follow the instructions mentioned in this article.
You may also like
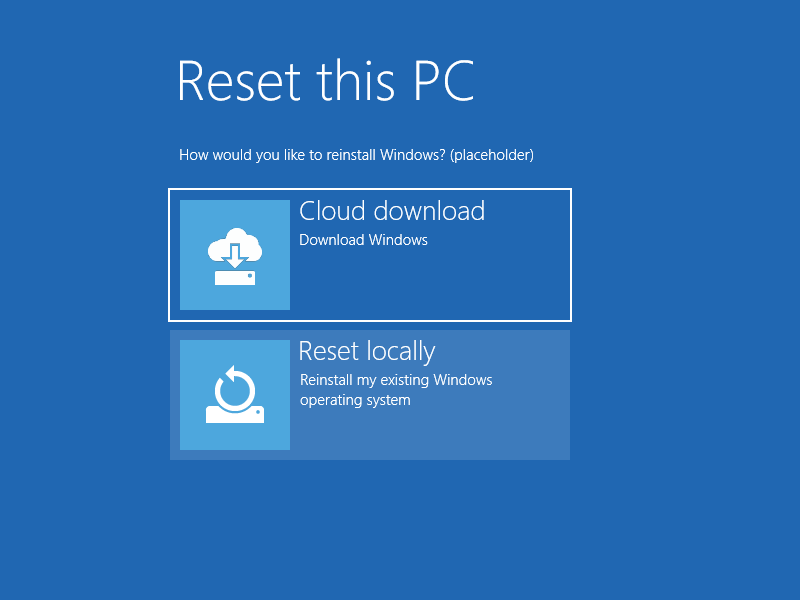
How to Reset Restore or Reinstall Windows 10
This article is about how to Reset Restore or Reinstall Windows 10. If there is a problem with your

How To Get 1k Subscribers – A Simple Guide
This article is about how To Get 1k Subscribers using a simple guide. YouTubers who want to own thei

How to use Facebook for E-commerce – 12 tips
This article is about how to use Facebook for E-commerce. Facebook can be a great way to make people