How to remove a page break in Word
Today we tell you how to remove a page break in Word. The process is easy and straightforward.
You can remove a page break in a Microsoft Word document by deleting it or from the Line and Page Breaks menu.
Clicking on the “Show/Hide ¶” option will allow you to see the page breaks you’ve created and remove them.
The line and page break routine is great for removing automatically inserted breaks, such as at the end of a page.
Page breaks can be a useful organizational tool when working in Microsoft Word. But if you use a lot – or worse, Word inserts a lot automatically – your document can quickly fill up with blank space.
How to remove a page break in Word
Here’s how to fix or remove page breaks in Microsoft Word, either manually or automatically, on Windows and Mac computers.
How to remove manual page breaks in Word for Windows
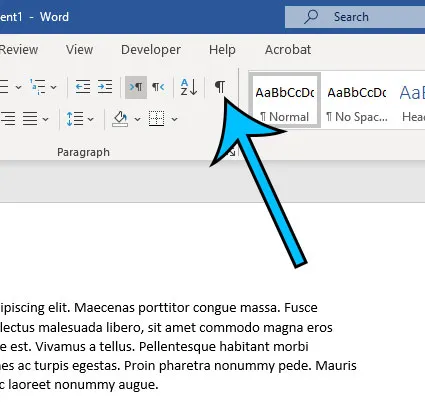
To remove page breaks that you added manually, click the Home tab.
Click Show/Hide ¶ to show page breaks in your document.
Find the manual break you want to remove and double-click the page break to highlight it.
Finally, press the Delete or Backspace key to delete it.
How to turn off automatic page breaks in Word on Windows
Select the paragraphs you want to change by using your cursor to highlight them.
Click Layout or Layout.
Next, click Breaks in the Layout section.
On the Line and Page Breaks tab, select the settings you want to apply.
Turn them all off to reduce automatic page breaks.
If you select “Window/Orphan Control“:
Word will automatically set a page break to prevent you from starting a new paragraph on the last line of a page, or having the last line of a paragraph only on a new page.
If you select “Keep with Next“:
Word will keep two consecutive paragraphs together but not separated by page breaks.
If you select “Keep Lines Together“:
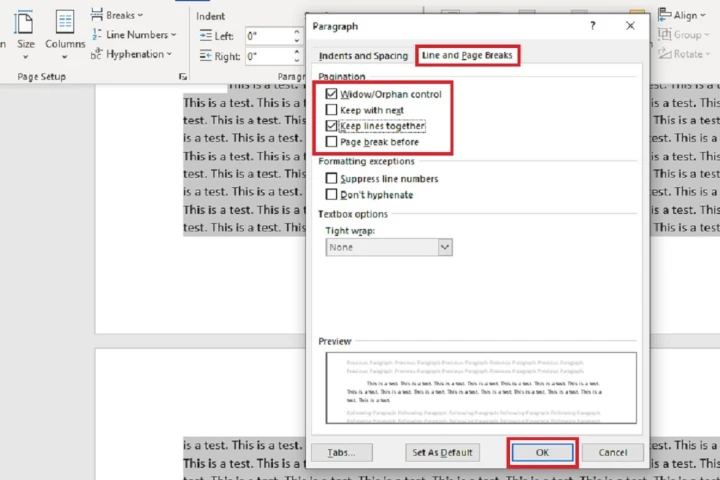
This option will prevent Word from adding page breaks between paragraphs.
If you select “Page break before“:
You can insert a page break before the selected paragraph.
How to remove manual breaks from Word on Mac
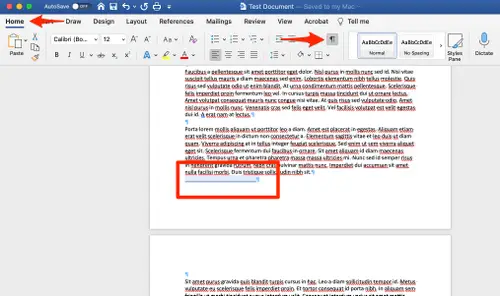
To remove manual page breaks, start by clicking the Home tab.
Then select “Show all non-printable characters ¶” to show page breaks in your document.
Find the manual break you want to remove, and click to the right of the paragraph mark.
You can also highlight page breaks.
Press the Delete key to delete it.
How to turn off automatic page breaks in Word on Mac
Select the paragraphs you want to change by using your cursor to highlight them.
Click on the Format tab.
Select a paragraph.
On the Line and Page Breaks tab, select the settings you want to apply.
Turn them all off to reduce automatic page breaks.
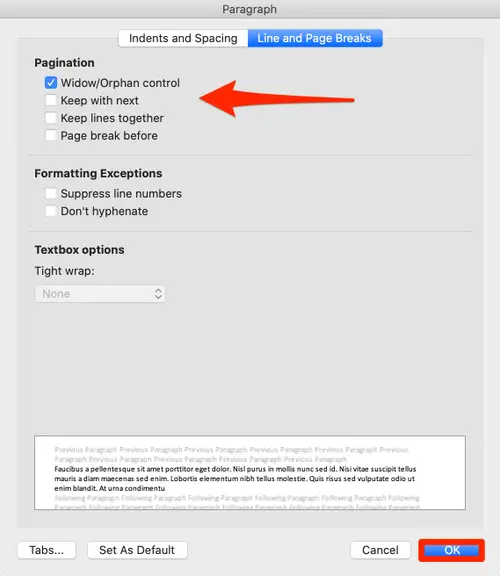
“Widow/orphan management” should include at least two lines of paragraphs at the top or bottom of the page.
This saves you from having a new paragraph start on the last line before a page break or having the last line of a paragraph only on a new page.
“Continue to next” will place two consecutive paragraphs together and not be separated by a page break.
“Concatenate lines” will prevent Word from adding page breaks between paragraphs.
“Page break before” can add a page break before the selected paragraph.
You may also like

How to Remove PDF Password on iPhone or iPad – 6 steps
This article is about how to remove PDF Password on iPhone or iPad. When opening a password-protecte
How Long Can a Smartphone Last: 15 Tips on how to Make Phone last long
This article is about how to Make Phone last long. How long can a smartphone last? Many people have

How to Get a Refund on Fiverr (The complete guide)
This article is about how to Get a Refund on Fiverr (The complete guide). “I ordered a gig from a