How to Install Plastic Lawn Edging – 7 easy steps
Plastic landscape panels add a beautiful look to your landscape. This article is about how to install plastic lawn edging. If installed correctly, plastic edging defines the lines of your lawn and flower beds, enhancing the design of your garden. However, plastic edging is not only for aesthetic purposes; this solid barrier keeps grass, dirt and rocks out of unwanted spaces.
How to Install Plastic Lawn Edging
Although a small installation works hard, plastic landscape edging can reduce landscaping costs for years to come.
1. Mark the boundary line where you want to install the border with spray paint
Use a tape measure to measure the height of your plastic straw.
Subtract half an inch from the measurement to determine the depth of the train to play.
2. Place the blade of a flat spade on one end of the drawn line.
Place the blade with its back facing the weed side of the row and use your foot to place the spade vertically on the ground.
Dig down to your calculated depth.
Turn the spade handle back and pull the handle, removing the spade full of soil.
Place the soil in a wheelbarrow or cart to store it later.
Repeat this process along the length of the marker.
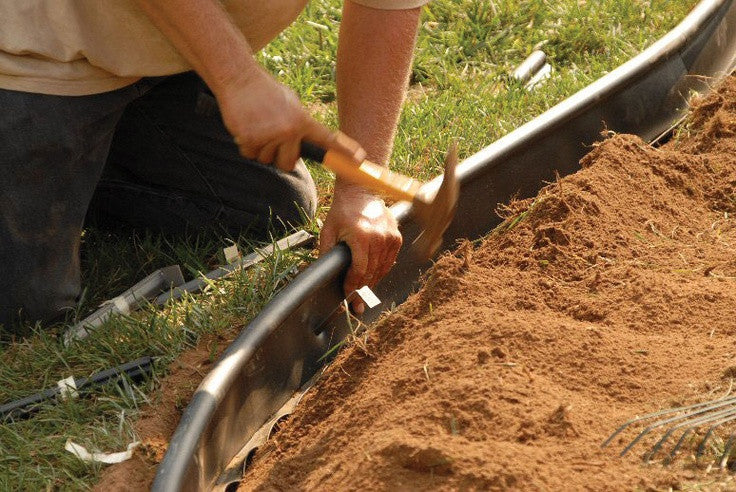
3. Move the landscape border, place it next to the trench.
Place the edge in the trench with the surrounding edges on top. Press the flat edge of the tip firmly against the trench wall facing the flower bed.
4. Connect the ends together if the first face piece is short.
Insert the first 4 inches of the border link into the opening of the first border page.
Use one hand to hold the circular part with the front link.
Begin around the opening of the second facing page above the exposed four-inch edge of the facing binding. Press the front piece of the connector until it touches the first part.
Use a knife to trim off any excess.
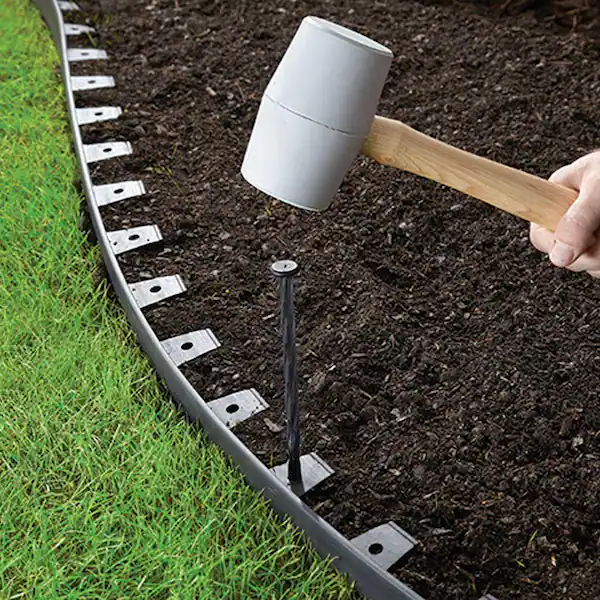
5.
Drive one stake at a 45-degree angle from the bottom edge in a V shape to one end of the plastic face using a hammer. Make sure that the plant passes through the end and the bottom wall under the edge of the grass.
6. Insert each plant 3 to 4 feet in length around the entire body.
Fill the trench with the soil you removed from the area, starting at one end of the pit.
Place the soil one shovelful at a time, using your feet to press the soil firmly against the block.
Stop filling the trench when the soil level in the trench is level with the surrounding soil.
Repeat this process along the length of the trench.
7. Water the area well with a garden hose.
Allow the water to soak into the soil, preparing the soil as it drains.
Fill in the holes or depressions that come out of it with other soil, compacting it well enough to compact it.
You may also like
how to get a split screen on mac
This article is about how to get a split screen on Mac. For people who spend more than a few hours a

How to Make Money as a Photographer on Instagram (a simple Guide)
The article How to Make Money as a Photographer on Instagram. In this article, I will give complete

How to Override Lost Mode on iPhone/iPad in 3 ways
The iPhone is lost or stolen and you have enabled the search for “My iPhone” on iCloud.c