how to replace an old kitchen sink with a new one
Today we have prepaid an easy kitchen installation guide for you. Before we tell you how to replace an old kitchen sink with a new one, you need to make sure that you have the right tools and that you that the right measurements for your kitchen sink. Also, you need to be vast with instructions from kitchen sink manufacturers on thing like the right measurements for pipes among other things.
Check the position of the opening
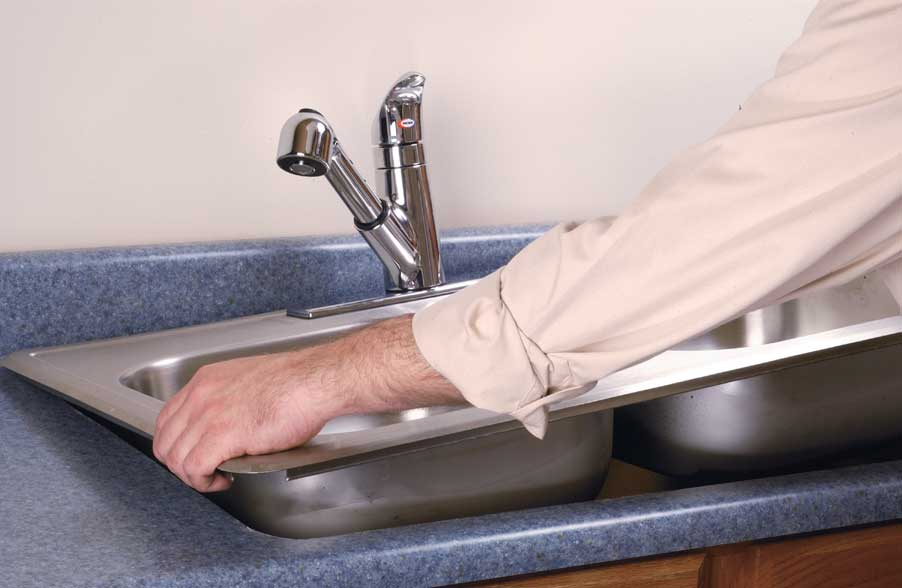
| Place the new water into the hole on the counter to check for a proper fit. If necessary, change the surface of the counter using a jigsaw, router or tile cutter. If your new sink has a larger area than the existing countertop space, move the sink back to where you want it on the countertop. Create new cuts in the jigsaw if need be. |
Tools Needed
| Bucket |
| Utility knife |
| Jigsaw |
| Screwdriver |
| Bar clamp |
| knife |
| Wrench |
| Channel locks |
how to replace an old kitchen sink with a new one
Step 1: Buy a sink that will fit the space
It’s easy to buy a sink that fits into an existing countertop space.
Although you can install a sink that is smaller than the hole, it can be difficult to expand the hole.
Make sure you have the extras you need and have everything ready to go.
If you are replacing a cast iron sink, make sure you have enough muscle on hand to help manage the weight and adequate countertop support for the weight.
Step 2: Clean out the sink cabinet and get in there with a flashlight
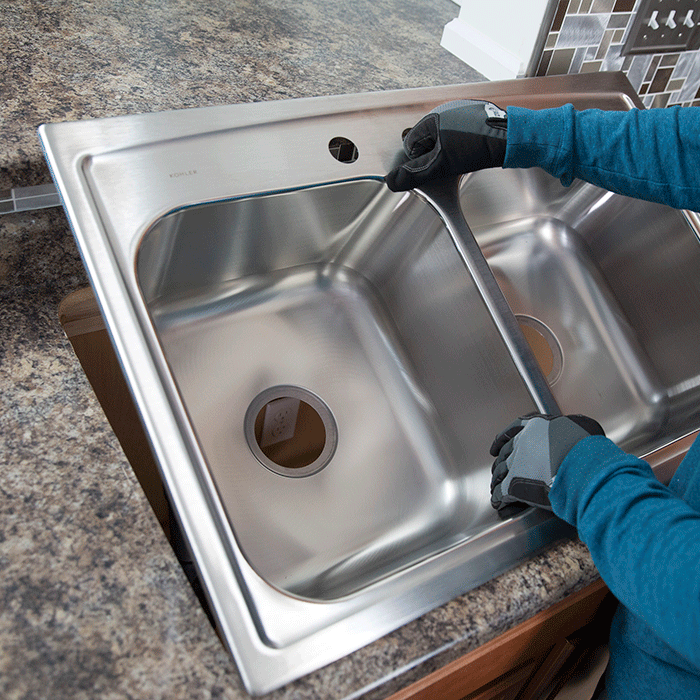
Locate the clip that secures the sink to its edge on the countertop. Remove them and disconnect the supply and drain pipes.
Step 3: With your helper holding the sink from above, turn the old sink from below
You may need to knife the putty around to loosen the old caulking joints. Once the old sink is removed, test the new one.
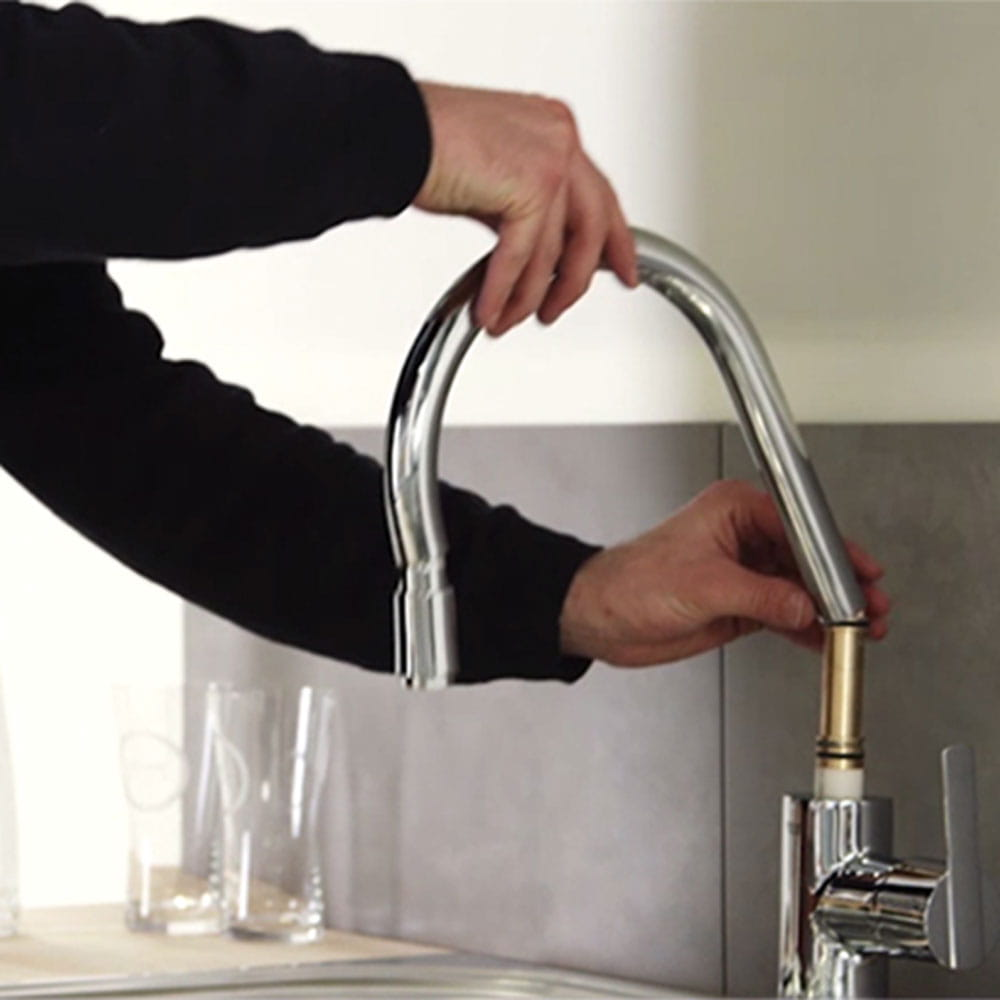
Step 4: Prepare the new sink by installing the pipes according to the manufacturer’s instructions.
The two most common mistakes when installing a kitchen sink are forgetting to clean the new sink properly before installing it and forgetting to install a new faucet before installing a new sink.
New factory stainless steels smell bad, so it’s best to wash them outside.
But it’s easy to install the faucet before you install the sink, because at that time, the rising nuts get more space.
As you install the faucet, install all accessories, including the dispenser and soap dispenser. Contact a professional chef
Find licensed kitchen construction professionals in your area and get free, no-obligation estimates for your project.
Step 5: When installing the waterproofing and sprayer base, first apply a bead of plumber’s putty
Before entering the boat and the sprayer, they need plumber’s putty to make the connection strong. It’s easier to work with plumber’s putty when you warm it up with your hands.
Roll the putty into a string, then press the putty around the faucet and sprayer base.
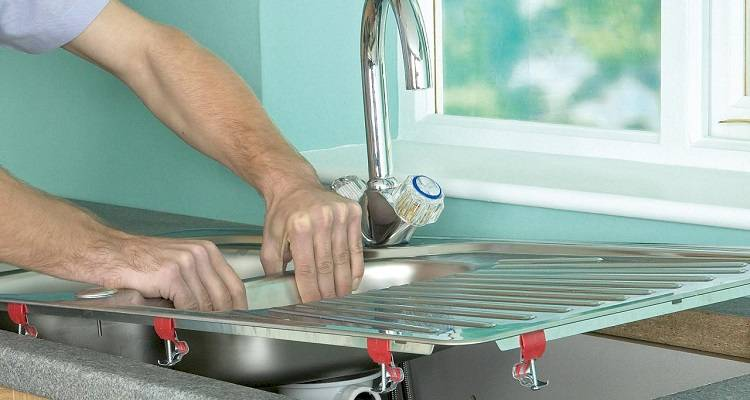
Step 6: Put putty under the rim of the sink and put it in the hole.
Make sure the counter surface near the sink is clean and free of dust.
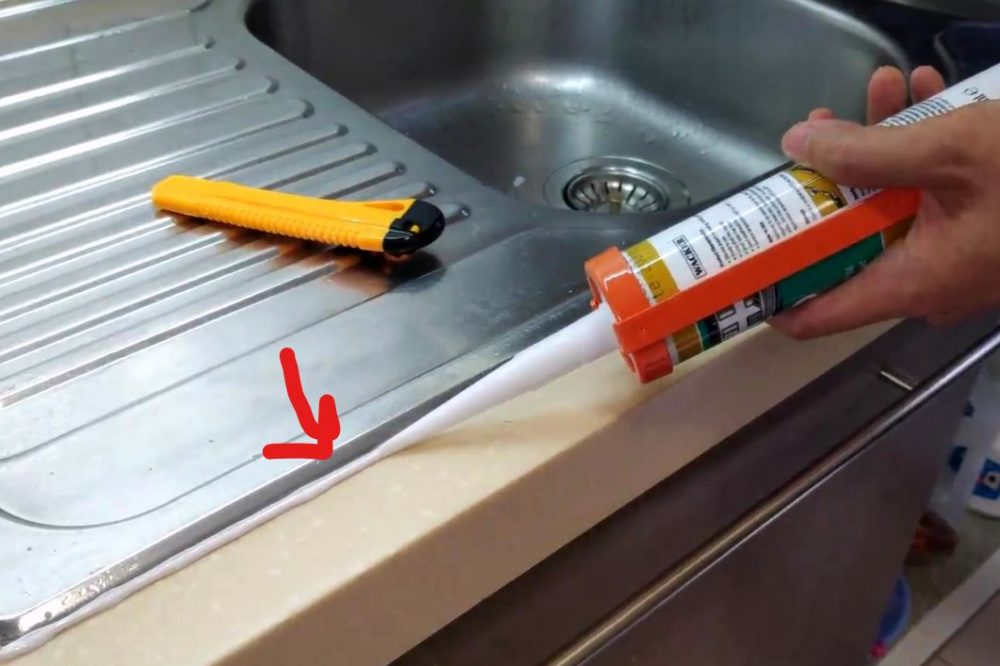
Then run a line of caulk around the hole about 1/2 inch from the hole using a caulk gun.
Be sure to use caulking that prevents the growth of mold and bacteria.
Once the sink is in place, apply a bead of caulk around the perimeter between the worktop and the sink.
The cover will keep the sink in place and create a strong barrier that will prevent water from the counter from splashing between the sink and the counter.
Finally, insert the clips that hold the sink in place.
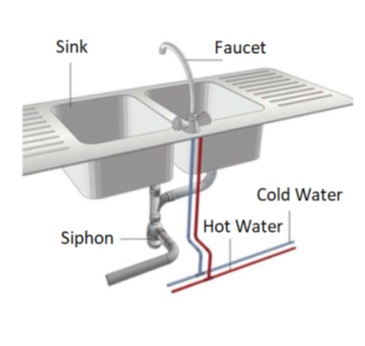
Step 7: Install the drain and pipe fittings, put them with putty and use the gasket and nut provided
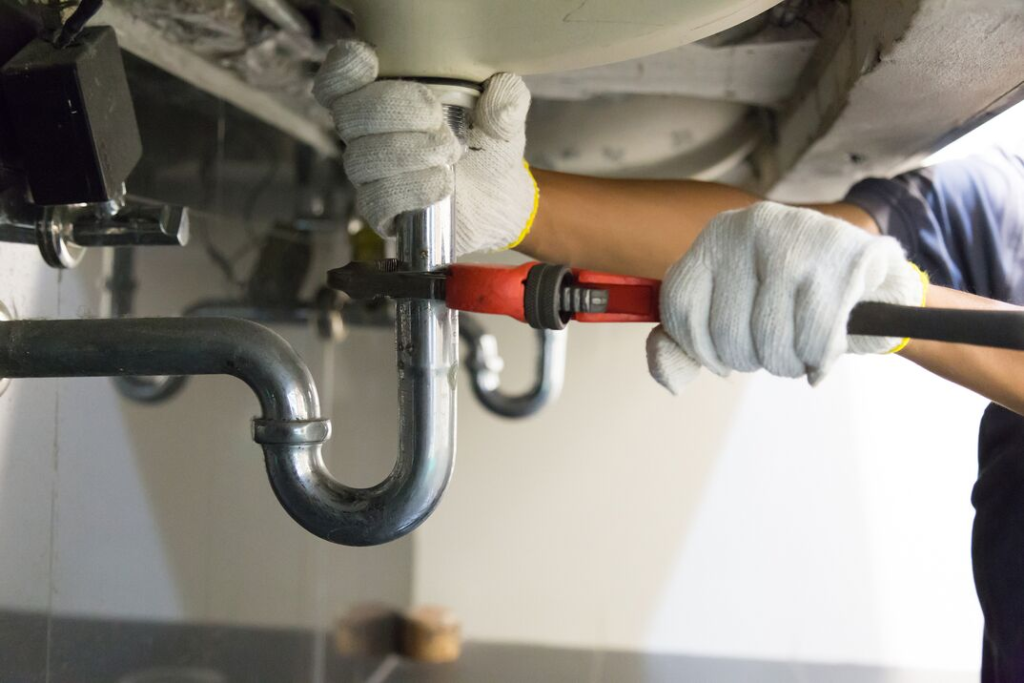
Run a bead of caulk around the edge of the basket, then insert it into the sink drain hole.
Install the gasket around the water line under the sink, then tighten the nut and tighten with a drain hose or water clamp.
Clean any excess clutter that falls from the basket drainer into the sink.
Step 8: Install the tail and connect it to the water supply
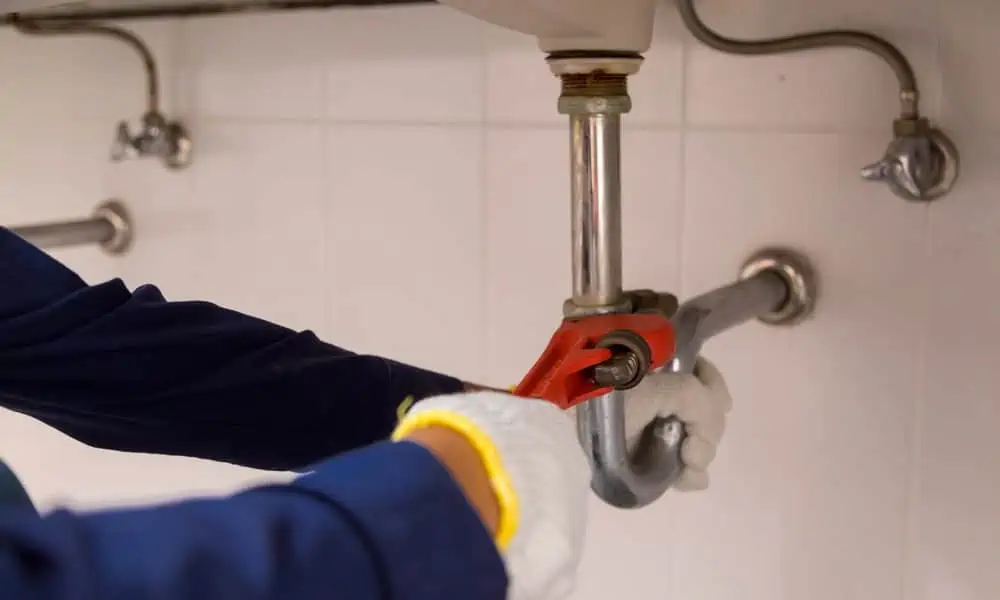
Place the tail in the sink, making sure to position the tail joint so that the end of the part is facing up.
Use the tail end to thread the end of the sink drain pipe.
Cut a 40 gauge PVC pipe so that the tail fits into the drain pipe.

tail piece
Attach the pipe to the tailpipe.
Connect the P-trap to a suitable material in the water drain. Once all connections are made, tighten each nut with a locking device.
Step 9: Connect the supply hoses to supply lines
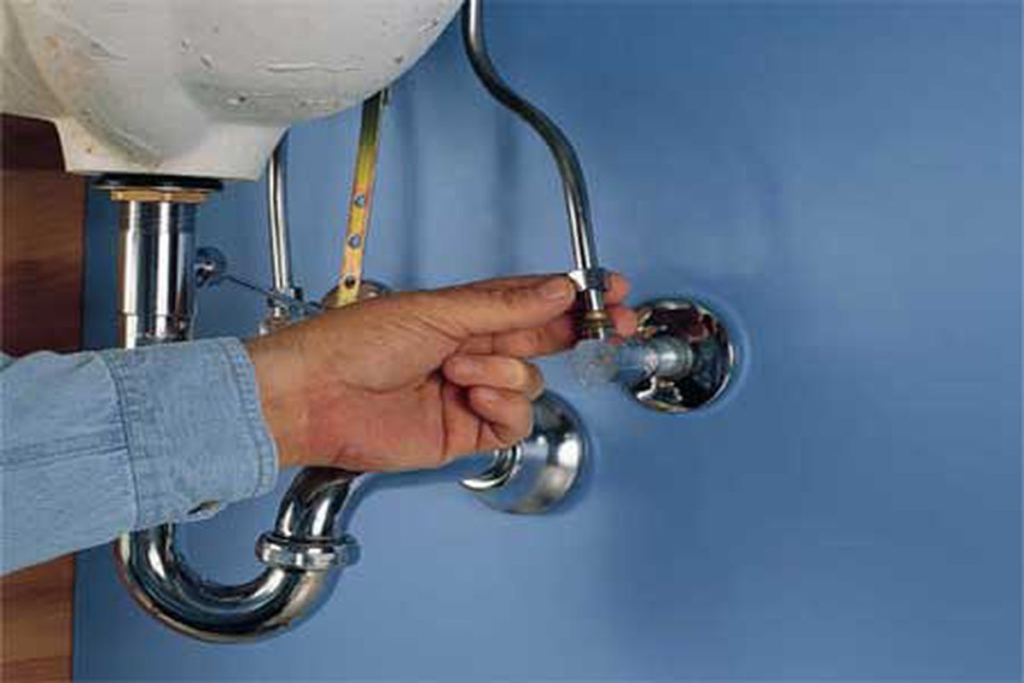
Reconnect the supply lines from the pipe to the valve under the sink using this flexible ring. If you are using supply hoses (recommended), don’t use old brands.
The rubber gasket that seals the joint may have hardened over the years and may not fit properly with the new punch ring.
STEP 10: Turn off the water and run it for several minutes

Check for leaks in all connections, especially in pipes, around drains and around traps.
You may also like

how to Fix Windows 10 Gets Stuck on Restarting Screen Issue
This article is about how to Fix Windows 10 Gets Stuck on Restarting Screen Issue. It can be frustra

how to protect a woocommerce online business – 6 main security tips
Today we give you easy security tips on how to protect a woocommerce online business. Running a succ
how to install a kitchen sink – 13 Easy steps
Here is a simplified guide on how to install a kitchen sink. We have used 13 easy steps to show you