How to Increase Hard Disk Space in VMware Virtual Machine – 2 ways
This article is about how to increase hard disk Space in VMware Virtual Machine. If your VMware virtual machine is running out of disk space, you can increase the disk space according to your needs. We will show you how to increase disk space in VMware virtual machine.
How to Increase Hard Disk Space in VMware Virtual Machine
Two ways are for your choice.
- Method 1: Increase disk space from virtual machine settings
- Method 2: Increase disk space in VMware using direct commands
Method 1: Increase disk space from virtual machine settings
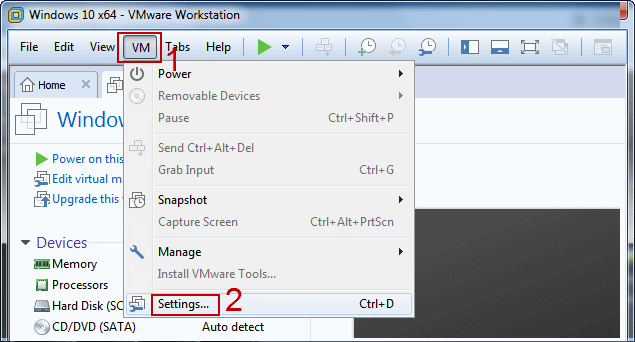
Step 1: Launch VMware and open the target virtual machine, but do not install this virtual machine. Turn off the virtual machine, as shown in the picture below. Click VM > Settings from the menu.
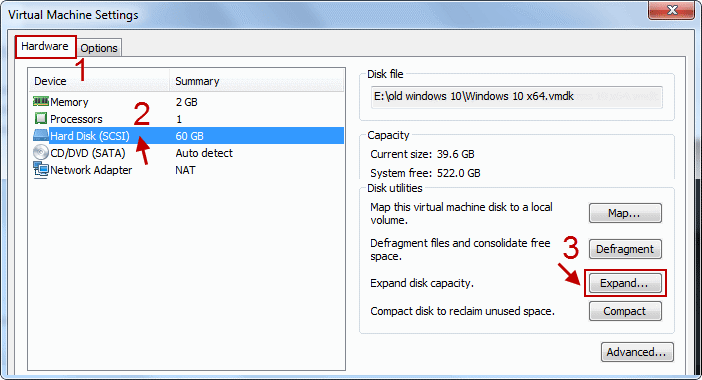
Step 2: After the virtual machine setup, click Hard Disk (SCSI) under the Hardware tab, and then click Expand in the right pane.
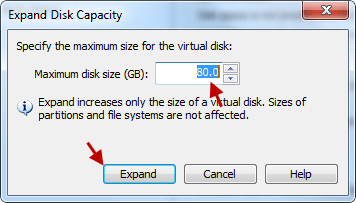
Step 3: When a small window appears, enter a value in the Maximum disk size box, and click Expand.
Step 4: After a few minutes, the virtual machine hard disk is successfully expanded.
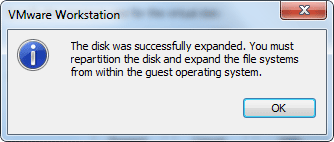
Click the OK button to complete the process. the disc is more elongated
Method 2: Increase disk space in VMware using direct commands
Step 1: Make sure the VM is powered off and all snapshots are deleted.
Step 2: Locate the virtual disk file. Open the Virtual Machine Settings window, go to the Hard Disk section, the file path is displayed under the Disk Files section.
E:\old windows 10 windows 10 x64.vmdk

Step 3: Find the VMware installation folder.
Right-click on this installation folder while holding the Shift key on your keyboard, and select Open command window here from the context menu.
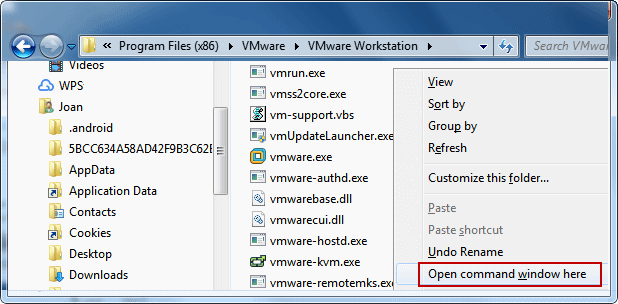
Tip: If you do not know where your VMware is installed, right-click the VMware software desktop icon, and select Properties to check the installation location.
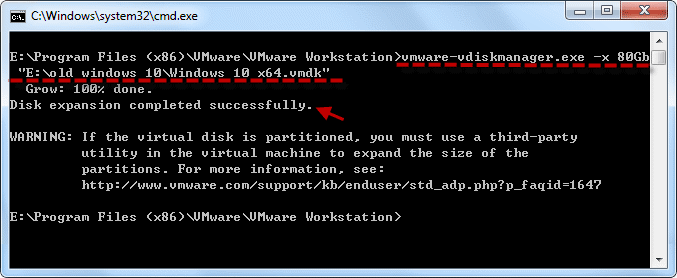
Step 4: Once the command prompt opens, type this command and press the Enter key to increase the disk space of your virtual machine.
When the growing process reaches 100%, the disk expansion is successfully completed. vmware-vdiskmanager.exe -x 80gb “E:\old windows 10 windows 10 x64.vmdk“
What to do next after increasing VMware disk space?
Although the virtual disk size has been extended, this space will be allocated to the disk of the virtual machine. Because additional space is not available directly for virtual machines.
To make more space available, it must be allocated to the virtual disk using the Disk Management utility.
Step 1: Turn on VMware, open Disk Management in VMware, you will see the “unallocated space” that I created behind C drive.
Click Action > Rescan Disk.
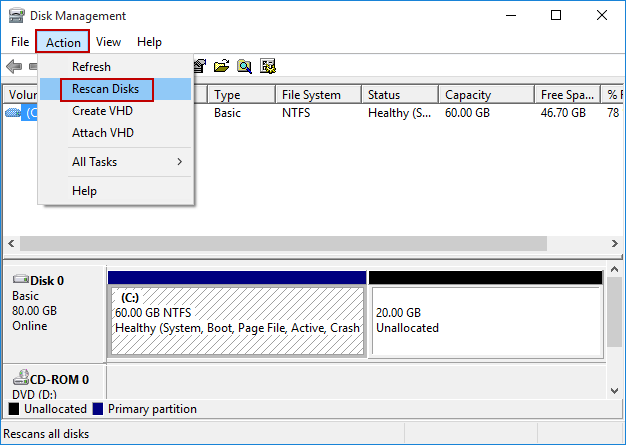
This will now scan your disk.
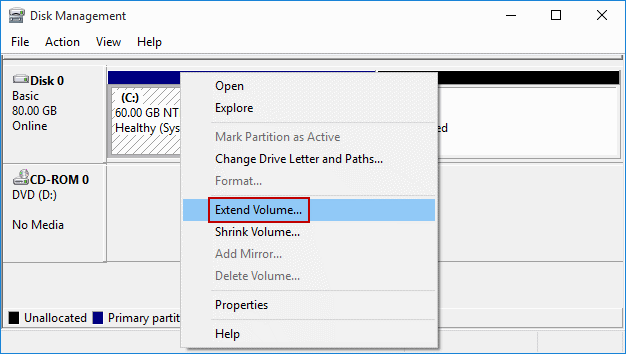
Step 2: After formatting the disk, right-click the C drive and select Extend Volume.
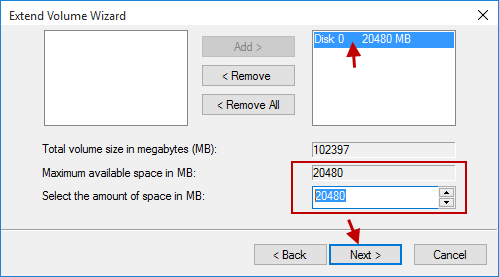
Step 3: When the Volume Extension Wizard appears, click Next to continue.
Enter all unauthorized access to the virtual disk and click Next.
Step 4: Finally, click on the Start button to complete the process.
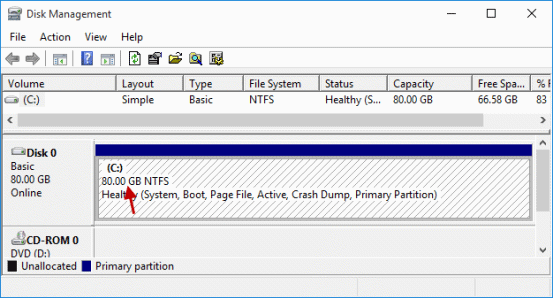
Then you can see unallocated space that is properly allocated to the virtual disk.
The virtual disk will be larger than before.
Not enough space was allocated
Well, it’s also easy to increase disk space in VMware from virtual machine settings or applications.
You may also like

how to insert footnote in microsoft word or endnote
This article is about how to insert footnote in Microsoft Word or Endnote. Although footnotes are no

get your microphone working on Google Meet in 7 ways
Few things are more frustrating than trying to join a conference call only to find that no one can h

how to backup apple watch and restore backup data
Experts agree that the best way to protect your data is to back it up. That way, if your device ever