how to get a split screen on mac
This article is about how to get a split screen on Mac. For people who spend more than a few hours a day on their computer, the ability to use split screen on their Mac can be a huge time saver, or good for the way they work. With the ability to keep apps on one side of the screen and Word/Chrome tabs on the right or vice versa, you can work twice as fast in half the space you need. Instead of spending more than you need on a second scan,
here’s how to get a split screen on Mac:
If you are on macOS Big Sur or Catalina,
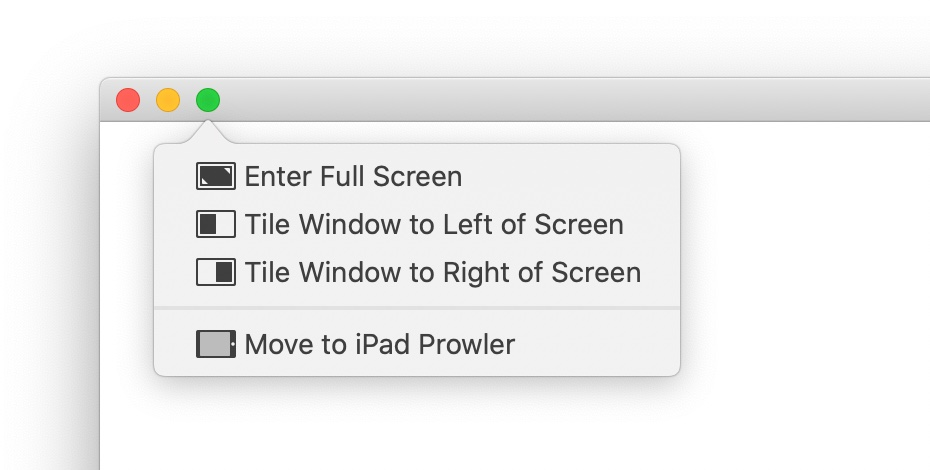
hover over the green fullscreen button until you see “Tile Space Left of the Screen” or “Tile Space Right of the Screen” – come out. Experiment between the two until you find a setting that works.

If you’re using macOS Mojave, High Sierra, Sierra, or El Capitan,
split screen is still a breeze.
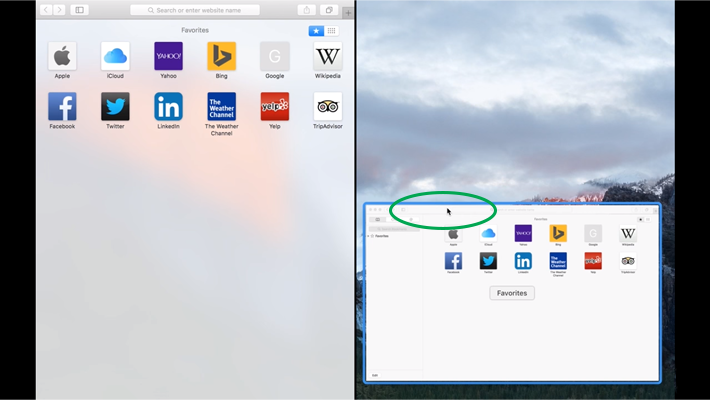
Hold down the green full screen button until the window collapses. Translate to any part of your screen and release it.
You’re ready to start working on the split view.
Click anywhere in the left or right window.
Move the pointer over the screen and wait for the menu bar to appear.
You can change the window position by dragging your window to either side and adjust the width by clicking the horizontal bar in the middle of each window.
exit split screen
Remove split screen by hovering over (or clicking) the green full screen button until you see “Remove split screen”.
Press the button and call it a day.
You may also like

how to start and promote reseller hosting business easily- 8 tips
Starting a reseller hosting business can be a great way to make extra money or even start your own b

How to Encrypt External Hard Drive on Mac without Erasing data – 4 steps
This article is about how to Encrypt External Hard Drive on Mac without Erasing data. We’ll sh
how to find windows 10 product key or digital license
Windows 10 is installed thousands of times every day on new and old computers. But without a receipt