
how to fix Internet that Keeps Disconnecting on Laptop Windows 10
This article is about how to fix Internet that Keeps Disconnecting on Laptop Windows 10. There is nothing more annoying than having the internet stop on a Windows 10 laptop every few minutes.
If you find this situation where your laptop stops connecting to the Internet, it is not easy for your work, but don’t worry, we will show you how to solve the problem of the Internet stopping on a laptop under Windows 10.
how to fix Internet that Keeps Disconnecting on Laptop Windows 10
- Method 1: Reset the WLAN AutoConfig Service
- Method 2: Turn off network adapter settings
- Method 3: Change the network connection speed to duplex
- Method 4: Use Command Prompt (Admin)
Method 1: Reset the WLAN AutoConfig Service
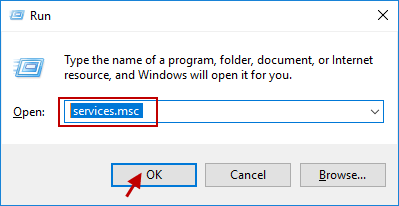
Step 1: Open the task window in Windows 10.
Press Windows key + R to open the Run box on your keyboard. Then type services.msc and click OK button.
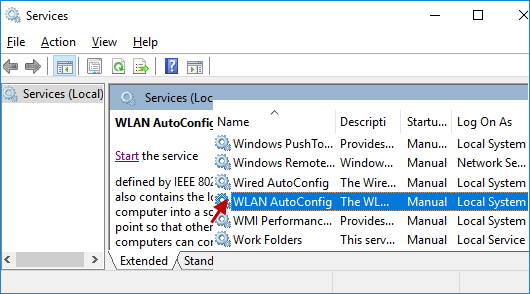
Step 2: Find and double-click WLAN AutoConfig on the right side of the Services snap-in window. WLAN automatic configuration
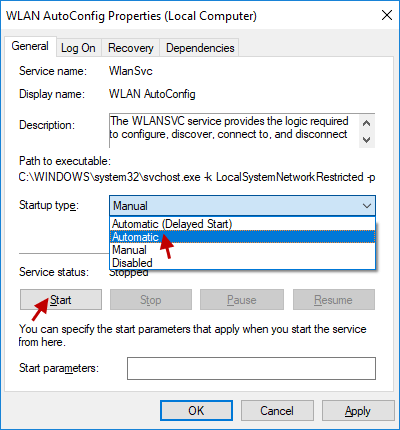
Step 3: When a new pop-up appears, change the startup type to Automatic and click the Start button.
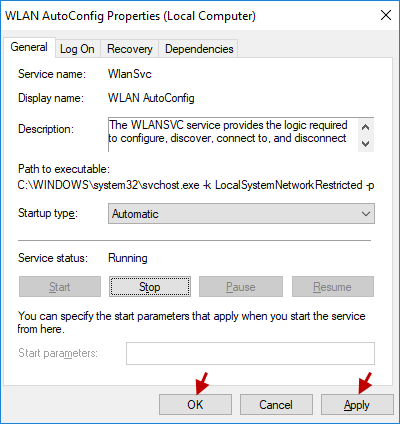
Step 4: Click Apply and OK to save changes and exit the window. Click Add and OK
Check if your internet connection is working properly.
Otherwise, go to method 2.
Method 2: Turn off network adapter settings
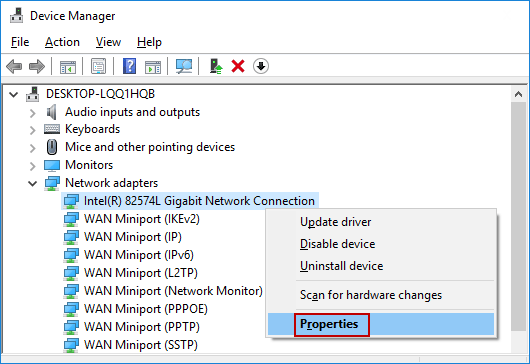
Step 1: Open Device Manager in Windows 10.
Step 2: In the Device Manager window, expand Network Adapters. Right-click on your network connection and select Properties.
Step 3: When the Properties dialog box appears, go to the Power Management tab, click the “Allow the computer to turn off this device to save power” option and click the OK button to save your changes.
Switch to power management
Restart your PC to check if the problem persists. If so, you can try the other methods listed below.
Method 3: Change the network connection speed to duplex
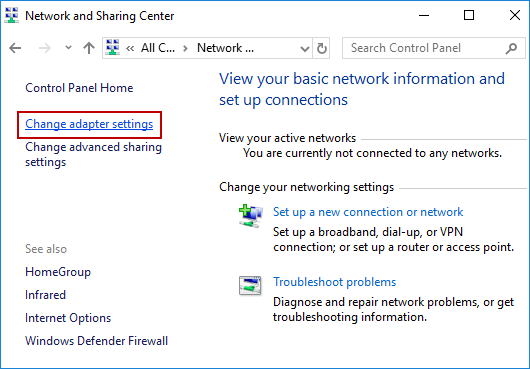
Step 1: Open Network and Sharing Center in Windows 10.
Click Change adapter settings on the left side.
Step 2: In Network Connections, right-click on the network adapter (I’m using Ethernet) and click Properties from the context menu.
right click ethernet
Step 3: Click Configure…
click Configure
Step 4: Switch to the Advanced tab, scroll down and click Speed and Duplex, set the value to 10 Mbps half duplex and click the OK button. Go to the advanced tab
Now check if your internet connection is working properly.
If the problem still persists, you should follow the next steps.
Method 4: Use Command Prompt (Admin)
Step 1: Open Command Prompt as Administrator in Windows 10.
Step 2: In the Command Prompt tool, type the following commands, press Enter after each command.
After executing each command, which displays the relevant parameters as shown below.
ipconfig / flushdns
ipconfig / release
ipconfig / renew
Close the window and check if your internet connection is stable.
You may also like
how to fix PDF Password is Incorrect error – 5 steps
This article is about how to fix PDF Password is Incorrect error. So I told him that it is highly po
how to update internet browser
For most Internet users, your browser is your web browser. You use it to browse websites, and it sho

how to take care of your clothes
Today we have an article on how to take care of your clothes. Along with proper washing and maintena