how to create a wordpress popup without a plugin
Popups are a great way to increase user interaction on your website and to collect quality ads. Creating popups without pre-built WordPress plugins can be problematic, that’s why in this article you will learn how to create a WordPress popup without a plugin .
You will not use any background that can make your site heavy or slow to load. Plain vanilla javascript is the way to go.
Why custom codes?
There are many popup builders on the market that allow you to create your popup on a GUI platform with drag and drop tools and provide the exact API link that you want to paste on your site to make a popup window.
The issues you may encounter with this solution are of two types, related to security and price.
Most of them are paid, but not once the free trial period is over, you will break your bank. Another reason can be a threat that can install third-party scripts.
The risk of data theft may exist when you link to a JS file from another website.
With a popup that contains your own custom code, you can customize it as you want by knowing simple HTML, CSS, JS.
If you don’t know them, consider contacting us and we will help you.
how to create a wordpress popup without a plugin
The custom snippets plugin will benefit the situation because you will have full control over your popup even after changing or updating the website theme.
Change the provided code as you wish. Styles, any HTML style can also be added to the style. Be creative and inspire with your popup as you wish.
How to enter the code?
html
<div class="noti-box">
    <span id="popspan">
      <p>Click on <span style="color:#c13016;">'Start AI'</span> & <span style="color:#165CC1;">'Allow'</span> to let
        the AI access the Camera</p>
      <button class="ai-start-btn" onclick="popOff()">Okay</button>
    </span>
</div>
CSS
.ai-start-btn {
      font-family: Verdana, sans-serif;
      padding: 10px 18px;
      color: black;
      background-color: #f2c500;
      cursor: pointer;
      border-radius: 4px;
      border: 2px black solid;
      margin-bottom: 20px;
    }

    .noti-box {
      background-color: #151822ce;
      position: absolute;
      width: 100%;
      height: 100vh;
      display: flex;
      justify-content: center;
      align-items: center;

    }

    .noti-box #popspan {
      text-align: center;
      background-color: white;
      padding: 20px 30px;
      border-radius: 9px;
    }

    @media screen and (max-width:500px) {
      .noti-box {
        display: none;
      }
    }
JS
function popOff() {
      document.body.addEventListener('click', function (event) {
        console.log('clicked')
        document.querySelector(".noti-box").style.display = "none";
        document.querySelector(".vidicon").style.display = "none";
      })
    }
popOff()
For complex popups
The previous method of using custom code was just to add a simple space and configure it at the end.
If you want to add anything other than adding style and simple things, you need to get your hands on other people.
As mentioned earlier, other options may not be as reliable as your own scripted code, although they are easy to build and flexible to use.
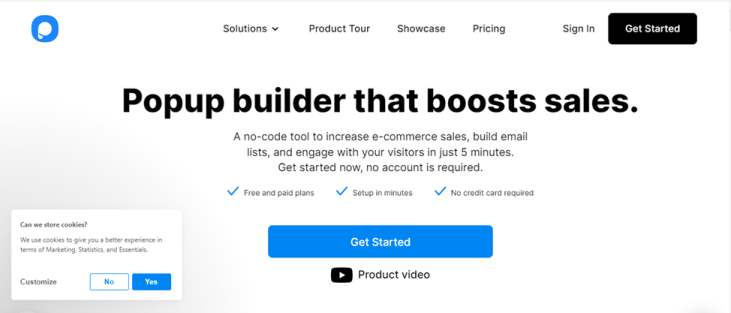
The platform I will use for this tutorial is Popupsmart.
It is easy to configure and install on your WordPress site.
Open Popupsmart

When you open Popupsmart, log in and navigate to the Dashboard area from the navigation bar at the top.
Click on “Create a new pop-up window“.
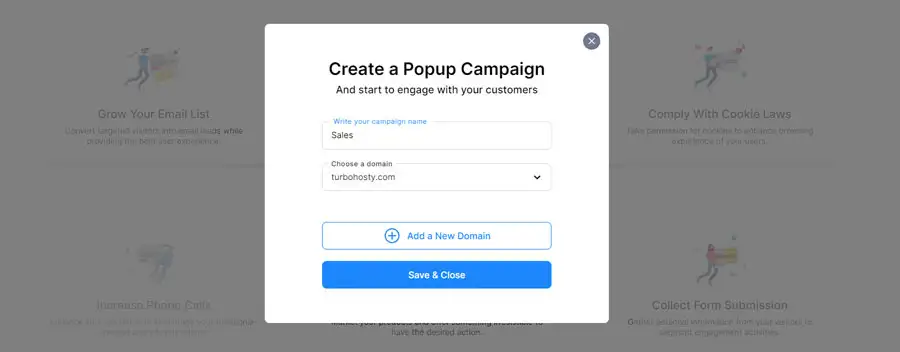
Choose a goal
Choose one of the provided goals, each with a specific algorithm for collecting data from users and returning different information for you as an administrator.
Changing the pop-up window
Change your popup by choosing one of the provided templates, check the acceptance of your design.
Add a trigger to the Popup, clicking a teaser popup will appear. Keep it clean and beautiful at the same time.
Choose the environment if you opt for smart mode.
Keep in mind that this can add a lot of code to your site, which will eventually break the site page.
Before publishing the popup and running your custom code,
- you can choose Google Analytics,
- responsive email,
- one-click popup button generator, and
- many other features.
Remember that before publishing, you must verify your site by adding a code snippet. If you don’t want to add this code for security, as discussed earlier, consider a custom code first. I hope this is useful, if you are having trouble reaching us through the comments we will get back to you as soon as possible.
You may also like
How to Recover Office Word Excel PPT Password with GPU Acceleration – 4 steps
This article is about how to Recover Office Word Excel PPT Password with GPU Acceleration. Leaving t
How to Turn on off Bluetooth on Windows 10 Laptop Today- 2 tips
This article is about how to turn on off Bluetooth on Windows 10 Laptop today. Currently, most Windo

how to change windows 10 SCREENSAVER to slideshow or custom animation
Windows 10 comes preloaded with default screensavers to protect your monitor from degradation. Some