how to clean your refrigerator quickly – 5 easy steps
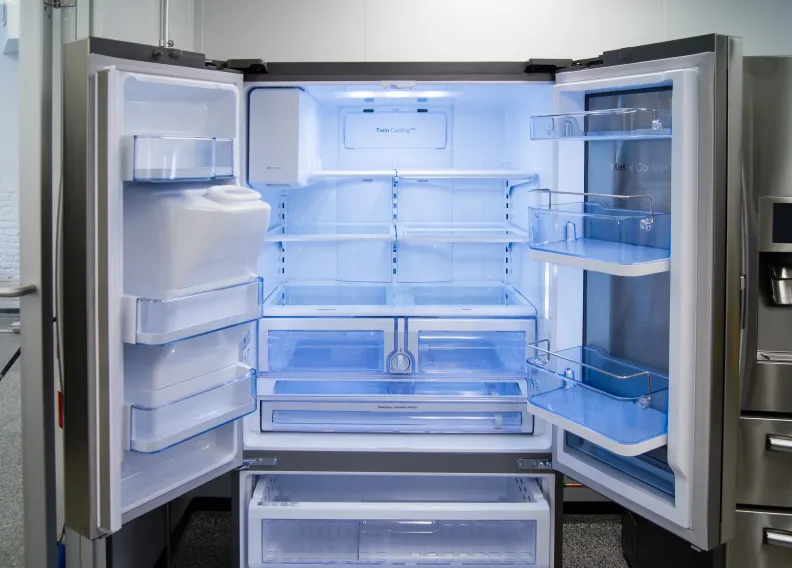
The process of cleaning a refrigerator does not have to be complicated. Today we tell you how to clean your refrigerator quickly and effectively. Your fridge sees a lot of stuff every day, but not all of it is pretty – leftover chili splatters; Forgotten vegetables become slimy. In the end, the refrigerator looks like a piece of art that doesn’t belong in a modern museum. This art is also interactive, but not in a fun way. Bacteria and odors from leaks and stains can spread through the unit and into other foods. The results can make your stomach turn, in more ways than one.
If this explanation sounds familiar, read on. On these pages, you will find strategies that will help you overcome these unwanted excesses quickly and easily.
Pick a day before you fill up at the store, when your fridge is the emptiest.
Remove the plug and turn the temperature control setting to “off” for safety.
Follow these steps on how to clean your refrigerator quickly
First step: work with your hands.
1: Prepare cleaning products
Most of the time, a bad refrigerator falls into the “out of sight, out of mind” disease.
The food in the back was closed most of the time, after all.
By keeping a cleaning kit nearby, you can try to clean up accidents as they happen.
Why did he run? For one thing, cleaning new spills saves the time and effort of cleaning things after they’re dry. It can also save you trips to the bathroom and even the emergency room.
A globe of deviled ham can carry colonies of Listeria, the bacterium that causes listeriosis, a foodborne illness characterized by nausea and diarrhea, fever and chills.
Life-threatening strains of E. coli can also survive in the refrigerator.
A quick transition now can prevent long-term complications later.
The space in your refrigerator is close to the sink, which allows for storage and hot water.
Gathering resources with efficiency in mind. Fill a small bucket or bath with the basic tools for the most common tasks: terry cloths, sponges, brushes and cleaning materials with mild disinfectants such as bleach.
These tips show the wisdom of the proverb: “A place for everything and everything in its place”.
Tips for green cleaning
Killing bacteria and eliminating odors can be like a battle. However, it can be eco-friendly if you create your own cleaning products from common, non-toxic ingredients.
Try some of these ideas:
For general cleaning, sprinkle the area with baking soda and clean it with a cloth or sponge.
Or mix a solution of equal parts water and lemon juice or wine.
Use a toothbrush and toothpaste to clean the chrome.
Place a cotton ball soaked in vanilla to freshen up in a still room.
If things have progressed to the point of mold, use a paste of salt and vinegar to attack the fungus.
2: keep food safe and preserved
Organizing your food into groups will make it easier to transport them back and forth. Organizing your food into groups will make it easier to transport them back and forth.
Cleaning out the refrigerator is a good time to organize the contents to make them more visible and accessible. Foods that are easy to see and reach will be overlooked and become the source of future odors.
Additionally, spreading the food to allow cool air to circulate helps keep them at their peak.
You can also check your owner’s manual or your favorite food information source for information on how and where to store different items. Storing food in the right place extends its quality and shelf life.
Also, some foods should be separated for their own good.
Apples give off ethylene gas as they grow, for example, which can cause green beans to drop early. In contrast, apples are filled with the aroma and taste of onions.
When cleaning, collect food from each area of the refrigerator in separate containers.
Use the refrigerator for fish and other perishable foods.
A simple dish will be enough for complex foods such as pickles. You can tie them to the table or counter. Check out all the deadlines and hear the main points of doubt.
Clear the sweet potato salad or slimy ham before it becomes a threat. For our next step, we put in the pool.
3: Place the removable part in the sink
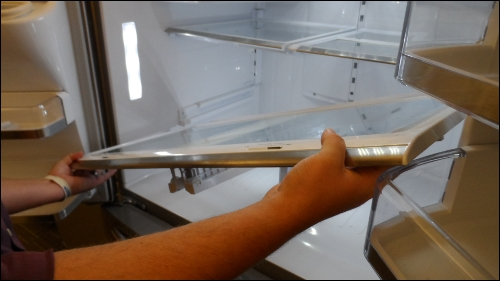
Getting into the nooks and crannies of the refrigerator to clean the shelves, shelves and drawers is a good stretching technique. If you would rather avoid calisthenics, soak these pieces in a sink or tub of hot water and soda.
(You can use a hand of dishwashing liquid, but some people say that the soap remains in the room and leaves the food with their different taste and smell.)
This food The raisin is absorbed in its aroma.
Be careful when placing cold glass shelves in hot water, however.
A sudden drop in temperature can cause them to explode.
While these areas are being bathed, grab a toothbrush with some toothpaste and joint cleaning powder.
Bacteria can hide in these and other hard-to-reach places, where there is no water, where the air makes the entrances that make them more desirable for mold.
Thoroughly clean all surfaces to eliminate unwanted microbial hosts.
Before restoring the removable parts, you have to take care of the unit.
4: Work from top to bottom
Add that subtlety. Start at the top of the room to prevent dirty water or small amounts of food from spilling or falling onto the surface after washing. Use all the cleaners of your choice.
The same concept applies to outdoor cleaning. Start at the top of the refrigerator.
It is often the most neglected and cleanest area in the kitchen. If this is the case in your home, use hot water to double your cleaning power.
Use a toothbrush to clean around the hand (think of how many people put their mitts on it every day).
Then, use an all-purpose cleaner to wipe down the door and its sides and dry it to finish.
Remember that this idea can also work against you.
As the final resting place for spills and other nasties from above, the lowest areas – such as the space behind the crisper drawer and the bottom door – can be the dirtiest in the fridge.
It may require a little scrubbing to keep it clean. On the next page, we end our discussion with the proverbial ounce of resistance.
Cleaning the coils is good
About three times a year (that’s it), take out the fridge and clean the coils.
Use a bristle brush to remove dirt and dust. Use a nozzle (many manufacturers sell them) to clean between the coils and eat debris, and you’re good to go.
5: Clear the food
Keep everything under lock and key.
A clean, closed container is the best defense against spills and unpleasant odors.
Air conditioning also helps keep food fresher for longer.
And if damage occurs, it will end up with the bad food that is said. If you want to move back, opt for see-through containers if possible.
If you’re reusing store-bought items, label them.
Finally, don’t let your efforts go to waste: don’t forget to put in the fridge and turn the temperature control to “on”.
Choose the lowest location until the part is nice and cool – 38 degrees Fahrenheit (3.3 Celsius) or a hair below – before returning the inhabitants to their bright habitat.
You may also like
How to Install Plastic Lawn Edging – 7 easy steps
Plastic landscape panels add a beautiful look to your landscape. This article is about how to instal

how to start and promote reseller hosting business easily- 8 tips
Starting a reseller hosting business can be a great way to make extra money or even start your own b

How do i Turn off Automatic Updates on Windows 7
This article is about how do I Turn off Automatic Updates on Windows 7. Windows Update will allow yo