How to Boot Lenovo computer from USB in UEFI BIOS – 2 steps
This article is about how to Boot Lenovo computer from USB in UEFI BIOS. Sometimes, it is necessary to change the boot order to allow the computer to boot from a second source.
How to Boot Lenovo computer from USB in UEFI BIOS
To do this, it covers two steps:
- Enter the BIOS and
- change the boot order.
When trying to boot from a USB drive, connect the drive to your computer before entering BIOS.
Step 1: Enter BIOS
Option 1: Enter BIOS via function key
Restart the system. The PC screen will turn off, but it will turn on again and display the “Lenovo” logo.
Press the F2 key (Fn+F2) when you see the IdeaPad or Lenovo laptop screen above.
Other BIOS versions may use different keys.
If you’re on a Lenovo desktop and All-in-one, you can enter the BIOS by pressing the F1 key when the “Lenovo” logo appears.
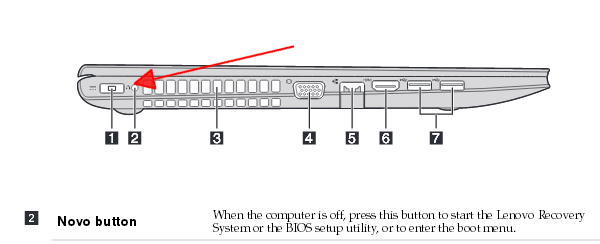
Some Lenovo products have a small Novo button on the side (next to the power button) that you can press to enter the BIOS setup menu.

Option 2: Enter BIOS by pressing the Shift key + Reboot the machine
If you don’t get it by pressing the key on the keyboard. Instead, you need to restart Windows and go to the login screen.
Hold the Shift key on your keyboard while pressing the Power button > Restart.
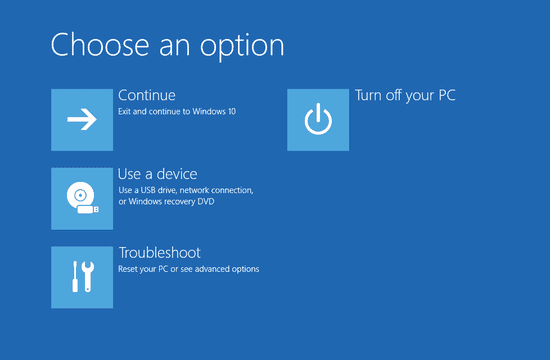
The computer will open the menu of several options.
Click on Troubleshoot> Advanced options> UFI Firmware> Restart.
You will enter the BIOS Setup Utility interface.

Use tools
Step 2: Change the boot order
Once you get to the BIOS setup screen, go to the Boot tab and find Boot Order or Boot Option Priorities, change the boot priority so that your USB drive is the first device.
In this illustration, the prefix can be changed to start using the uk.
Remember your bios can contain different instructions.
Using the + and – keys, for example, changes the USB key at the top of the boot process.
When you are done, press F10, you can save and exit all your actions.


