hide show and print hidden text in MS Word 2016
This article is about hide show and print hidden text in MS Word 2016. Sometimes you don’t want others to see some of the text in your Word document, but at the same time you don’t want to remove the text completely. In this case, it would be better to hide the text so that it is not visible. Now this article shows how to hide text and show/print hidden text in a 2016 Word document.
Part 1: How to hide text in Word 2016
Step 1: Open your Word document.
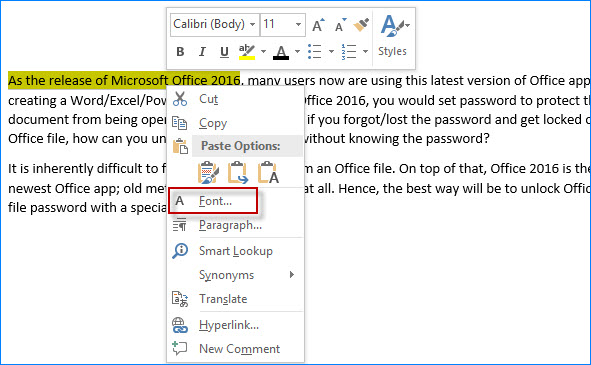
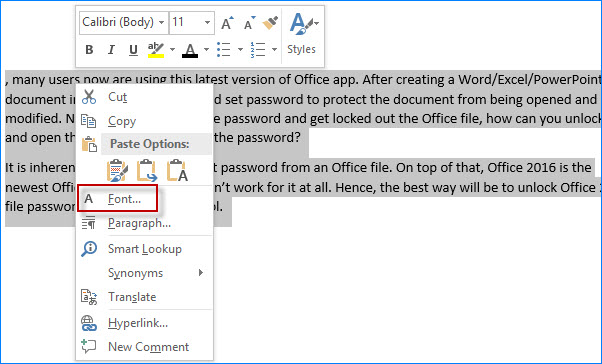
Step 2: Select to show the target text you want to hide. Right click on it and select Font.
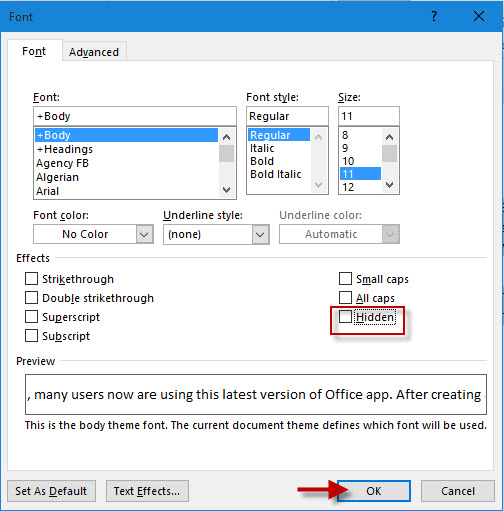
Step 3: In the Font dialog box, in the Effects section, check the box next to Hidden and click OK.
Step 4: Then you will see your selected text has been removed from the Word 2016 document.
The text is not deleted, only hidden.
Then press Ctrl + S to save the document.
Step 1: Press Ctrl + A to select and highlight all the text. Then right click on any text and select Font. Click on Fonts
Step 2: In the Font dialog box, in the Effects section, double-click the box next to Hide to remove the check mark, and then click OK.
Then you can see the hidden text displayed and see it.
When you print a Word 2016 document that contains hidden content, you can choose whether to print the hidden content or not.
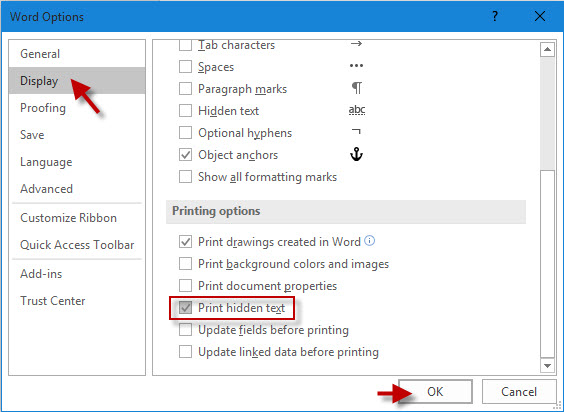
Step 1: Click File -> Options.
Step 2: In the Word Options dialog box, select View and go to the Print Options section.
To print hidden content, check Print hidden text and click OK.
To not print hidden content, uncheck Print hidden and click OK.
You may also like

how to uninstall programs on Windows 10 – create more space
Sometimes your Windows programs can feel like stubborn guests – they can’t leave. This a
how to generate table of contents in microsoft word
A table of contents adds a degree of formality and expertise to any book, whether it’s a book
How to change language on Apple Watch easily
This article is about how to change language on Apple Watch easily. Your Apple Watch automatically u